Allowances are the points your employees have to give to each other. You can set a default allowance for your employees in this tool, but you can also customize allowances for managers, and any other groups in Assembly.
Only admins can use this feature
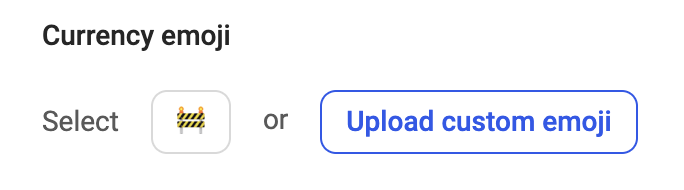
Set your currency name and select the emoji you would like to use for your currency
Determine value of your points, set different values for different employees in different office locations
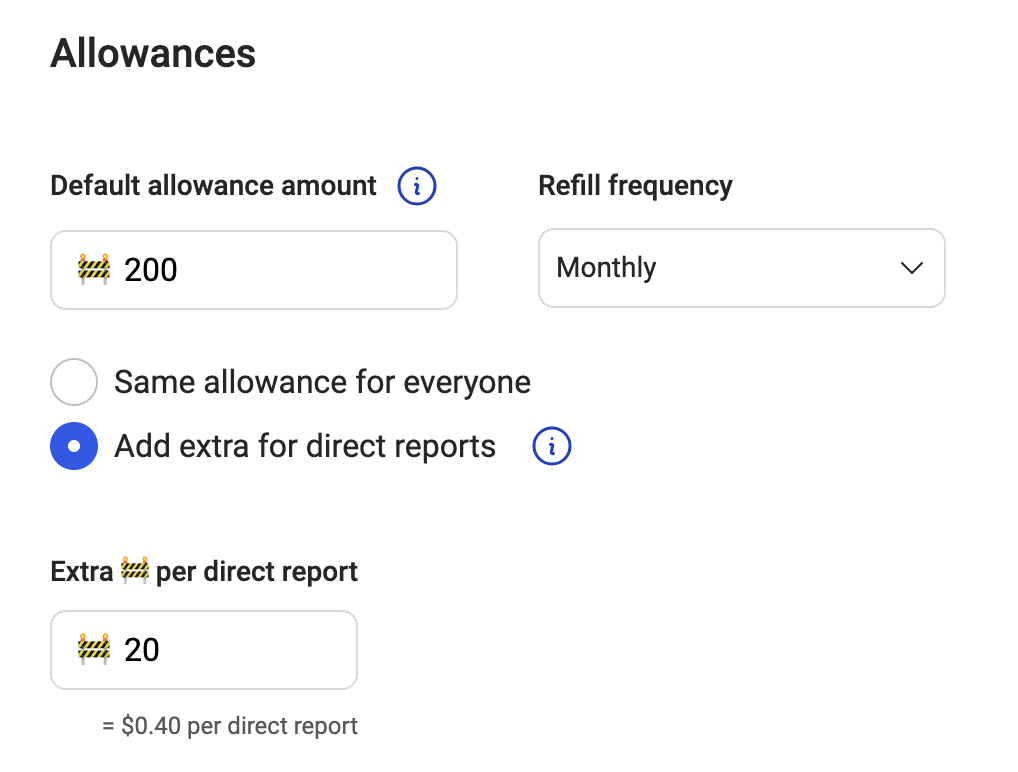
Set the default allowance for all employees in your Assembly
Add an extra automatic allowance for managers for each direct report
Create custom allowance rules for specific people or groups
Your currency name and emoji are what will display whenever someone gives/receives recognition.
Go to your admin page
Under workspace, click 'Allowances'
From the allowance settings tab, enter the singular name of your currency (i.e., 'Trophy')
Enter the plural name of your currency (i.e., 'Trophies')
Select the emoji you would like to use for your currency
If you want to upload a custom currency emoji, click 'Upload custom emoji'
If you have a custom emoji uploaded, it will override the default emoji selected in the emoji selector.
If you remove the custom emoji (by clicking the 'X' next to it), the default emoji in the emoji selector will become your currency's emoji
By default, $1 = 10 points in Assembly. With exchange rates you can now:
Change the point value to the $ value of your choosing
Set different point values for employees based on their work location (i.e., different values in different countries)

Go to your admin page
Under workspace, click 'Allowances'
For your account security, we lock this field to prevent any accidental changes or abuse. To unlock it for one hour for editing purposes, click 'Request to edit'.
This will initiate a conversation with our support team to verify and unlock this functionality.
Once unlocked, you can set the value of your points.
By default, this will be the default value for all of your employees, unless you select 'Set exchange rate by location'.
Exchange rate examples
$1=100 points, $1/100 points = $.01/point
$1=50 points, $1/50= $.02/point
$1=20 points, $1/20=$.05/point
$1=10 points, $1/10=$.10/point
If you have employees in other countries, you can adjust the value of your points by office location.
Select 'Set exchange rate by location'
Click 'Select location' to open the dropdown of available office locations
Select the office location(s) you wish to include in the exchange rate group
Enter the point value for the employees in this group
This will automatically save and apply this update to all employees in the group
To add another exchange rate value, click 'Add exchange rate'.
Similarly, if you set an exchange rate for certain office locations and not others, then the employees not included in the specified exchange group(s) will also receive the default value.
When your employees redeem rewards that have a monetary value (i.e., gift cards, experiences, etc.), the exchange rate will be calculated at the time of redemption
For example:
Employee A lives in Barcelona, Spain, and the office exchange rate is set to $1 = 9 points
Employee A has 900 points
Employee B lives in Los Angeles, California, and the office location exchange rate is set to $1 = 10 points
Employee B has 900 points
When employee A goes to redeem a gift card, they can redeem for up to $100 in gift cards
When employee B goes to redeem a gift card, they can redeem for up to $90 in gift cards
The default allowance is the allowance every employee will receive by default when they join the platform. Only employees with the role 'Normal' or 'Giver' will have a default allowance; 'Receivers' and 'Observers' cannot give points (you can manage these roles from the users/manage page).
Go to your admin page
Under workspace, click 'Allowances'
From the allowance settings tab, enter the default allowance amount
NOTE: if you set your default allowance to 0, your employees will not have any points to give. They can still give recognition, they just won't see the option to add points.
Set the refresh period (either monthly or quarterly)
If set to monthly, it will refresh on the first day of every month
If set to quarterly, it will refresh on the first day of every quarter (January 1, April 1, July 1, October 1)
If set to annually, it will refresh on January 1 every year
Select whether you want to apply the same allowance to everyone, or add additional points to the default allowance for managers.
If you select 'Add extra for direct report', add the amount of points you want each manager to receive in addition to the default allowance.
When this option is selected, each manager will receive that amount of points for each direct report they have.
For example:
Default allowance is 200
You add an extra 20 for each direct report
A manager with 3 direct reports will have 260 points each refresh period
Click 'Apply now' to apply the allowance value to all existing users immediately; otherwise it will not apply until your next refresh period.
If your refresh period is set to quarterly or annually, you have the option to prorate the giving allowance based on the number of months remaining in the cycle. NOTE: this proration only applies to people who have the DEFAULT allowance. This does not apply when:
You have extra points enabled for managers for their direct reports; the managers’ allowance will not be prorated
You have a custom allowance
You are part of an allowance rule
Quarterly proration example:
Default allowance = 300 points, Refresh period = quarterly
Proration enabled
An employee joins on March 9
They will receive 100 points giving allowance
March = 1 month remaining in quarter
300 points/3 months = 100 points per month
Annual proration example:
Default allowance = 300 points, Refresh period = annually
Proration enabled
An employee joins on March 9
They will receive 250 points
March = 10 months remaining in year
300 points/12 months = 25 points per month
25×10 = 250 points
If you want to create special allowances for specific people or groups, you can create a custom allowance.
Go to your admin page
Under workspace, click 'Allowances'
From the allowance settings tab, click 'Add a custom allowance'
If you want to select individual people (versus groups of people), select 'Create a rule by selecting individual people'
Click 'Select people' to expand the list of all employees in your Assembly
Search for and select the employee(s) you would like to include in this custom allowance
To apply the custom allowance immediately, click Apply now
To apply the custom allowance for the next refill cycle, click Apply on [date]
If you want to select a group of people, select 'Create a rule by role, department, and work location'
If you want to create a rule based on an employee's role (Admin, Manager, Employee), select the role from the dropdown menu
If you do not want to create the rule based on role, leave the selection empty. This will default the rule to ALL roles.
If you want to create the rule based on your employees' department, select a department from the dropdown.
If you do not want to create the rule based on department, leave the selection empty. This will default the rule to ALL departments.
If you want to create the rule based on your employees' work location, select a work location from the dropdown.
If you do not want to create the rule based on work location, leave the selection empty. This will default the rule to ALL work locations.
Combining any of the above selections will result in a list of employees who match ALL of the above selections
For example:
Role = Managers
Department = Engineering
Work location = Los Angeles, California
This would result in a custom allowance for Engineering Managers in Los Angeles, California.
Another example:
Role = empty
Department = C-Suite executives
Work location = empty
This would result in a custom allowance for ALL C-Suite executives, across all work locations and departments.
Give your custom allowance rule a name (to help you refer to it)
Set the custom allowance amount
If this is set to 0, the employees included in this custom allowance will not have any points to give. They can still give recognition, they just won't see the option to add points.
Click 'Save rule'
To apply the allowance updates immediately, click 'Apply now' in the custom allowance rules table; otherwise it will not apply until your next refresh period.
NOTE: If you remove an employee from a custom rule, or delete a custom rules, the employee(s) will receive the default allowance you configured in the 'Allowances' section. Unless they are part of another custom rule, in which case they will receive that custom rule's allowance instead.
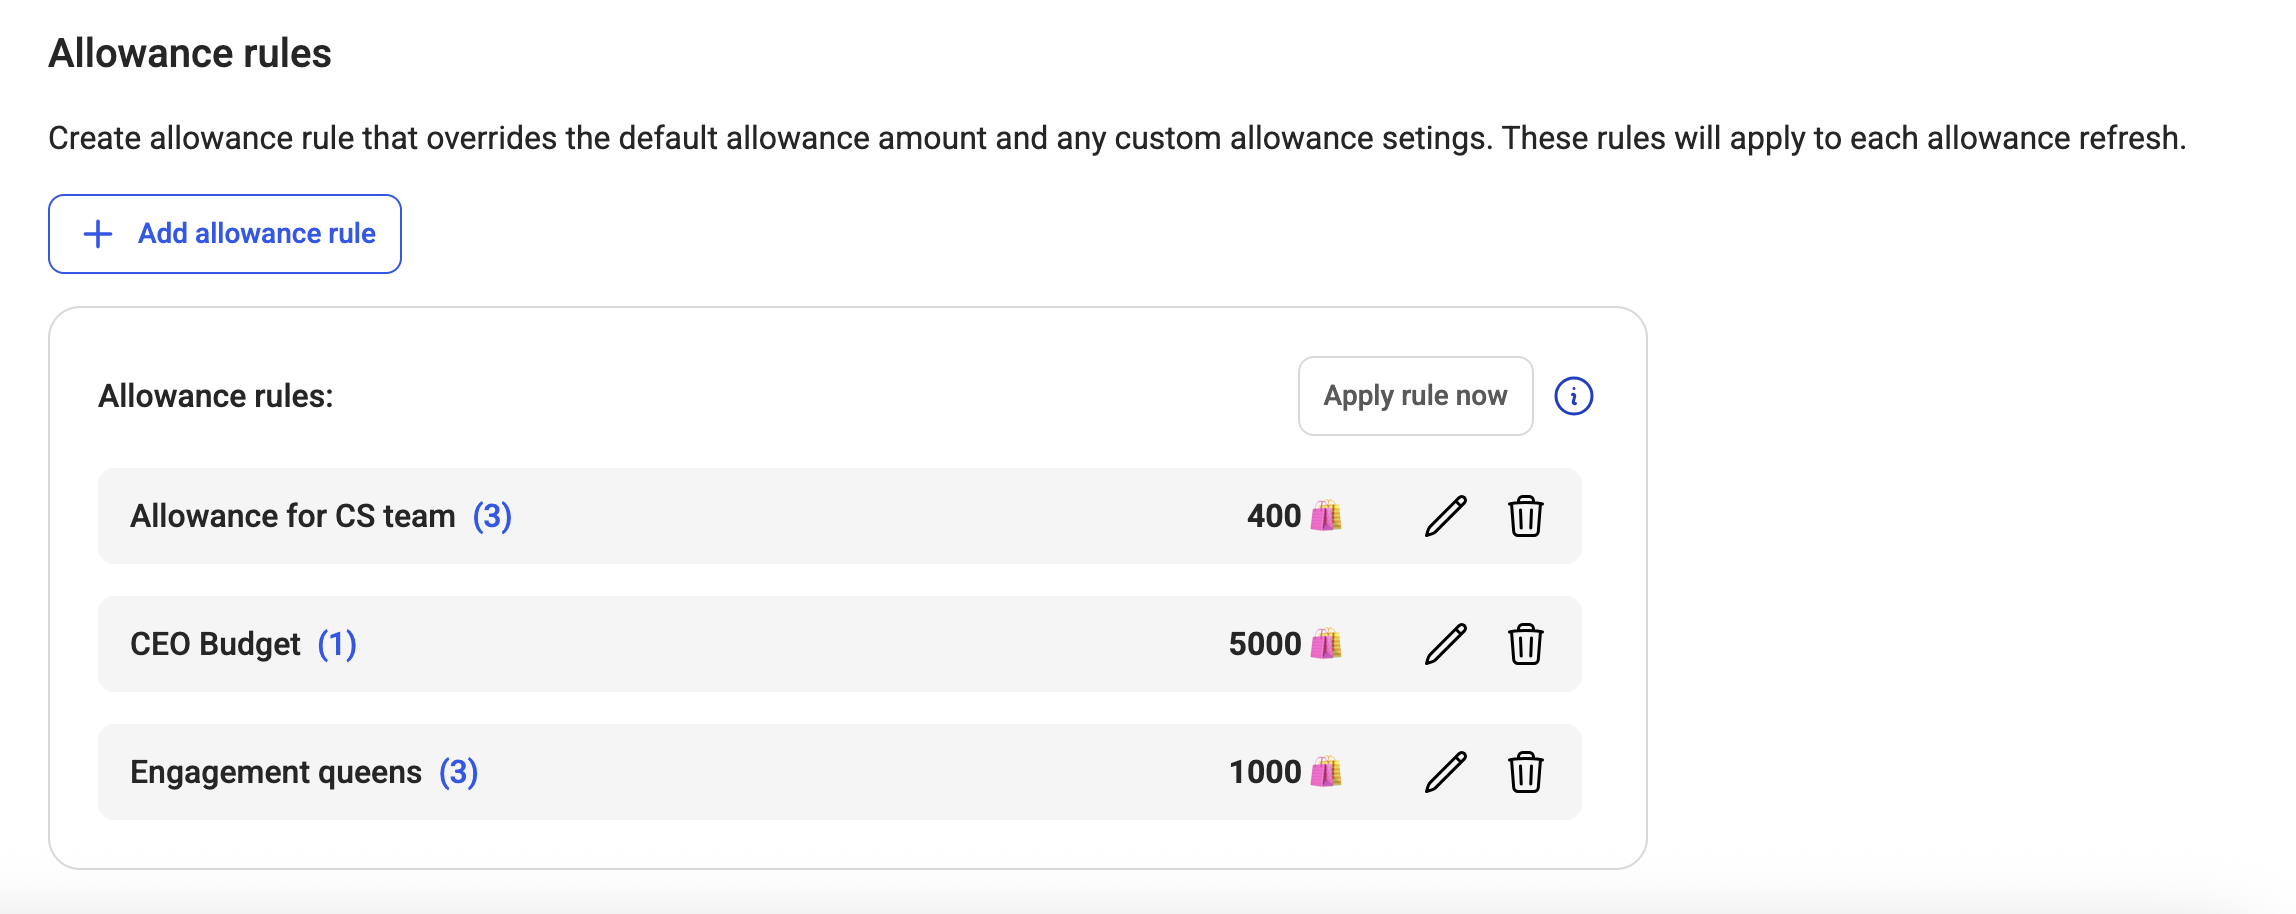
Edit custom rules
Go to your admin page
From the allowance settings tab, under workspace, click 'Allowances'
Under 'Allowance rules', click the 'Edit' icon
You can edit the employees in the custom allowance, the name of the custom allowance, or the value of the custom allowance
Click 'Save rule'
NOTE: If you change the value of the custom allowance, it will not apply until the next refresh cycle. If you need to add more points to an employee's allowance before the refresh cycle, see the 'Add additional allowance' section below.
Delete custom rules
Go to your admin page
Under workspace, click 'Allowances'
From the allowance settings tab, under 'Allowance rules', click the 'Delete' icon
Click 'Delete rule' in the confirmation modal
In the cases where you make bulk updates to your employee info, including allowances, through CSV or SFTP, any custom allowances added through these mechanisms will override the default allowance values. However, these custom allowances will not display in the 'Custom allowance rules' table.
If you would like to manage all of your custom allowances in one place, we recommend using this allowances tool to determine all allowances.
NOTICE June 9, 2025: We have added this page for admins to easily view and manage individual employees' allowances. Editing individual employee's allowances used to happen from the manage users page, but we have moved it to this page to keep all allowance management in one place.
You can view and edit your employees' recognition permissions and allowances from this page.
By default, all employees are given the permission to give and receive points
Employee allowances are determined by the allowance settings configured in the steps above
However if you need to make any individual changes to an employee's recognition permissions or allowance settings, you can do so by following the steps below
To edit an individual or multiple employees' allowances:
Go to your admin page
Under workspace, click 'Allowances'
From the user allowances tab, select one or multiple employees
Click 'Edit allowance' to edit their recognition permissions and allowance settings, OR
Click '+ One-time deposit' to add extra allowance to this employee's balance for the current allowance period (more details on this in the Deposits section below)
If editing allowance, you can update the recognition permissions and/or the allowance type/amount
If the employee(s) you are editing are part of an allowance rule (as determined in the allowance settings above), you must first remove them from that rule in order to edit their allowance.
Click 'Save changes'
These changes will apply immediately
Determine whether you want your employee to be able to give and/or receive recognition. There are four options:
Regular - can give and receive recognition
Giver - can only give recognition
Receiver - can only receive recognition
By default, they will have no allowance
Observer - can neither give nor receive recognition
By default, they will have no allowance
Determine what type of giving allowance you want your employee to have, default or custom.
Default - will give your employee the default allowance as determined by your allowance settings
If your allowance settings are configured to give extra allowance to managers for their direct reports, they will be given that extra amount in addition to the default allowance amount.
Custom - will give your employee the custom allowance amount you designate when editing their profile details
No allowance - will restrict your employee from giving any points; they will not see any giving allowance in the platform. They can still give recognition, but they will not see the option to add points.
NOTE: The deposited allowance balance only applies to to the current cycle; their allowance will refresh to their regular amount in the next cycle. This deposit will take effect immediately.
In cases where you want to add additional one-time allowance deposit for a particular employee or employees for the current allowance cycle, you can use the deposit tool to instantly deposit more points into their giving allowance.
To deposit more points into an employee's giving allowance balance:
Go to your admin page
Under workspace, click 'Allowances'
Under the 'One-time allowance deposit' section, click 'Deposit allowance'
Click 'Select people' to expand the list of all employees in your Assembly
Search for and select the employee(s) for whom you would like to deposit points into their giving allowance balance
Click save